Building an Object Detection App quickly with Streamlit

Building an Object Detection Web App quickly with Streamlit
Sometimes, you may want to quickly create a graphical interface for others to test your model, but you don’t want to deal with front-end technologies. This is where Streamlit comes in, allowing you to quickly create a web application using Python syntax.
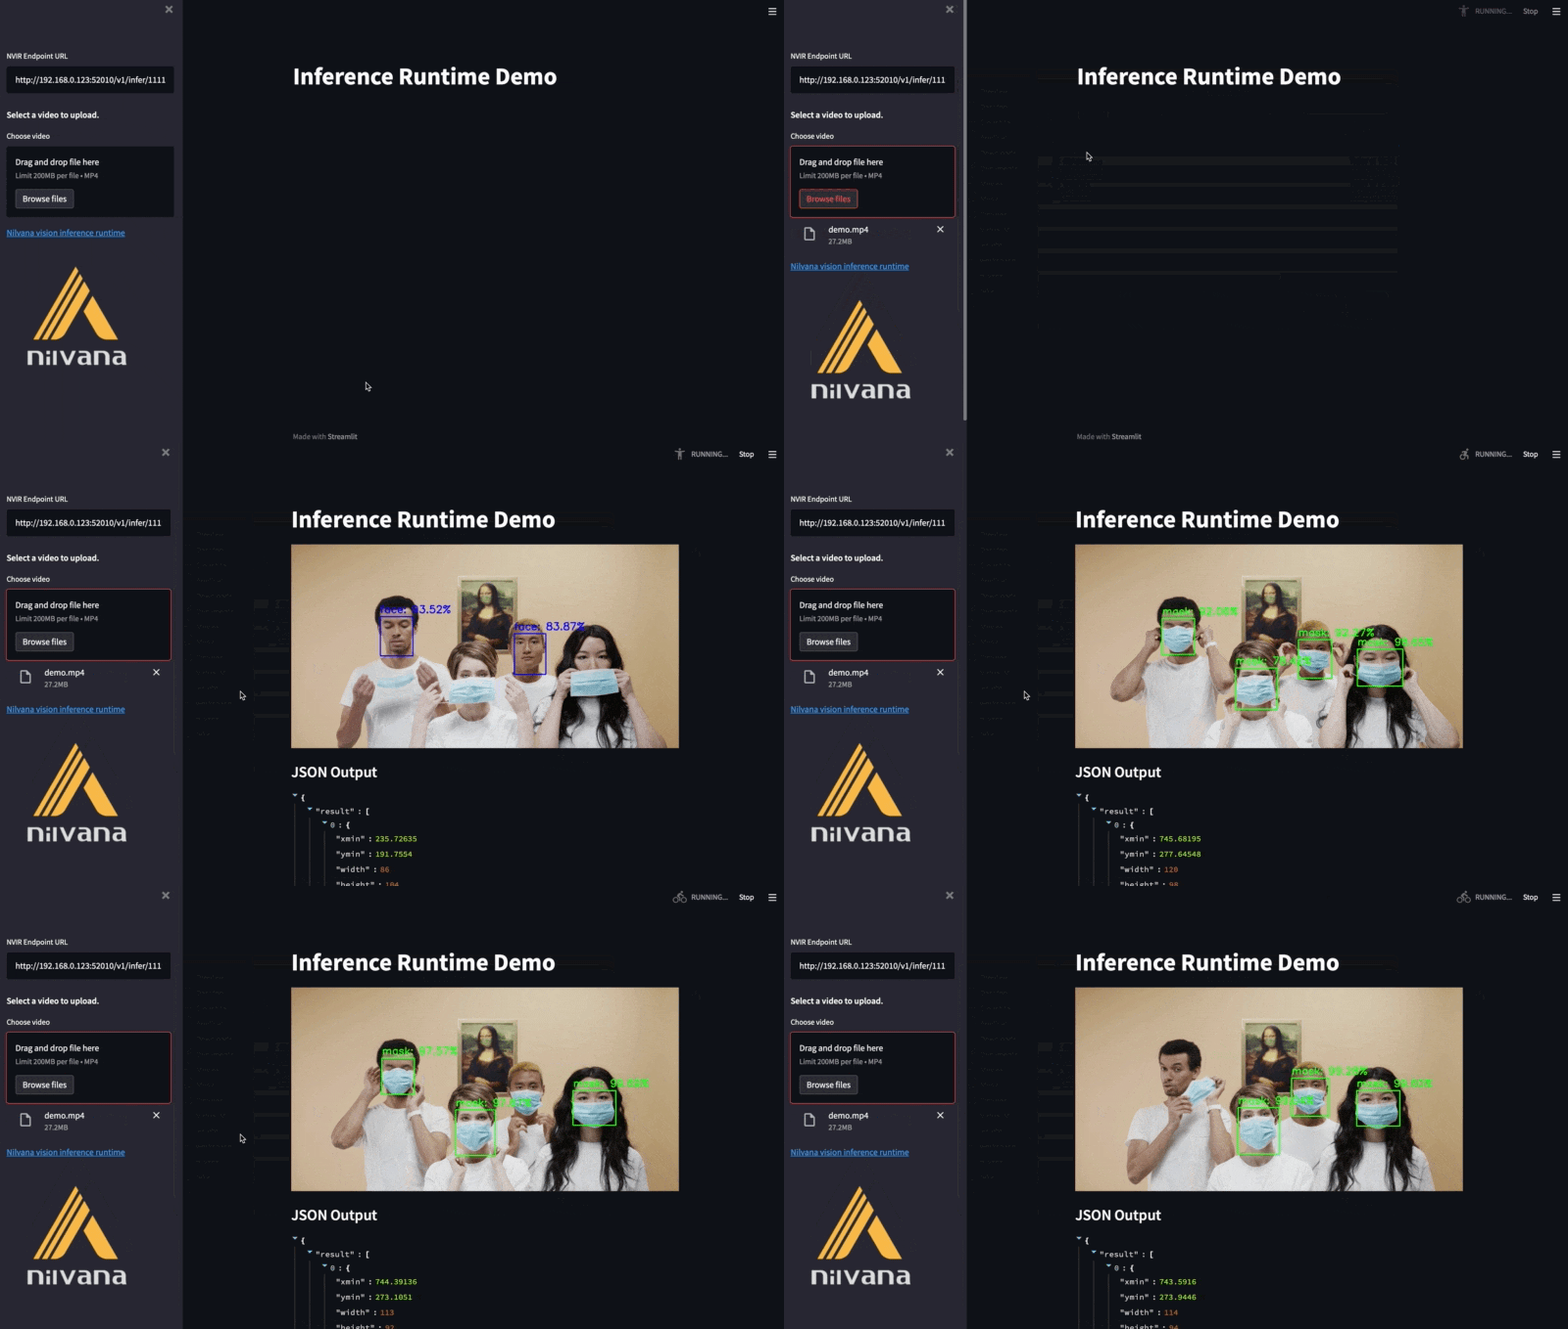
In this article, I will show you how to use Streamlit and Nilvana Vision Inference Runtime to quickly deploy a web application that can detect masks. If you are not familiar with Nilvana Vision Inference Runtime, it is a software package we developed for node-code deployment of AI models, which you can refer to in our previous articles.

The completed result is shown in the following figure:

You only need to install Streamlit by running pip install streamlit. Then, you can use the st object to generate the sidebar, and the entire process takes less than three lines of code.
import streamlit as st

url = st.sidebar.text_input('NVIR Endpoint URL', 'http://192.168.41.200:52010/v1/infer/111111111')

st.sidebar.write('#### Select a video to upload.')

uploaded_video = st.sidebar.file_uploader("Choose video", type=["mp4"])
The main screen is also quite simple. Declare two containers created by st.empty() to hold the video and JSON output, respectively. This step fixes the frame and JSON output positions. Open the video file through the main loop of OpenCV and obtain the inference result using the Restful API provided by Nilvana Vision Inference Runtime. Then, overlay the inference result on the frame. This part is similar to the content of the previous article. In other words, you can easily convert OpenCV applications into Streamlit web applications.
frame_holder = st.empty()
placeholder = st.empty()
# ... opencv parts
frame_holder.image(frame) # put your frame here

with placeholder.container():
  # Display the JSON in main window.
  st.write('### JSON Output')
  st.write(result)
The entire application can be completed in less than 60 lines of code, and we highly recommend that Python developers further explore this. The complete example code is also available on our GitHub page at the end of the article. Happy Deployment!


